Web scraping, often called web crawling or web spidering, or “programatically going over a collection of web pages and extracting data,” is a powerful tool for working with data on the web.
With a web scraper, you can mine data about a set of products, get a large corpus of text or quantitative data to play around with, get data from a site without an official API, or just satisfy your own personal curiosity.
In this tutorial, you’ll learn about the fundamentals of the scraping and spidering process as you explore a playful data set. We’ll use BrickSet, a community-run site that contains information about LEGO sets. By the end of this tutorial, you’ll have a fully functional Python web scraper that walks through a series of pages on Brickset and extracts data about LEGO sets from each page, displaying the data to your screen.
The scraper will be easily expandable so you can tinker around with it and use it as a foundation for your own projects scraping data from the web.
Prerequisites
To complete this tutorial, you’ll need a local development environment for Python 3. You can follow How To Install and Set Up a Local Programming Environment for Python 3 to configure everything you need.Step 1 — Creating a Basic Scraper
Scraping is a two step process:- You systematically find and download web pages.
- You take those web pages and extract information from them.
pip). PyPI, the Python Package Index, is a community-owned repository of all published Python software.
If you have a Python installation like the one outlined in the prerequisite for this tutorial, you already have pip installed on your machine, so you can install Scrapy with the following command:
pip install scrapy
If you run into any issues with the installation, or you want to install Scrapy without using pip, check out the official installation docs.
With Scrapy installed, let’s create a new folder for our project. You can do this in the terminal by running:
mkdir brickset-scrape
Now, navigate into the new directory you just created:
cd brickset-scraper
Then create a new Python file for our scraper called scraper.py. We’ll place all of our code in this file for this tutorial. You can create this file in the terminal with the touch command, like this:
touch scraper.py
Or you can create the file using your text editor or graphical file manager.
We’ll start by making a very basic scraper that uses Scrapy as its foundation. To do that, we’ll create a Python class that subclasses scrapy.Spider, a basic spider class provided by Scrapy. This class will have two required attributes:
name— just a name for the spider.start_urls— a list of URLs that you start to crawl from. We’ll start with one URL.
scrapy.py file in your text editor and add this code to create the basic spider:
scraper.py
import scrapy


class BrickSetSpider(scrapy.Spider):
    name = "brickset_spider"
    start_urls = ['http://brickset.com/sets/year-2016']
scrapy so that we can use the classes that the package provides.
Next, we take the Spider class provided by Scrapy and make a subclass out of it called BrickSetSpider. Think of a subclass as a more specialized form of its parent class. The Spider subclass has methods and behaviors that define how to follow URLs and extract data from the pages it finds, but it doesn’t know where to look or what data to look for. By subclassing it, we can give it that information.
Then we give the spider the name brickset_spider.
Finally, we give our scraper a single URL to start from: http://brickset.com/sets/year-2016. If you open that URL in your browser, it will take you to a search results page, showing the first of many pages containing LEGO sets.
Now let’s test out the scraper. You typically run Python files by running a command like python path/to/file.py. However, Scrapy comes with its own command line interface to streamline the process of starting a scraper. Start your scraper with the following command:
Output
2016-09-22 23:37:45 [scrapy] INFO: Scrapy 1.1.2 started (bot: scrapybot)
2016-09-22 23:37:45 [scrapy] INFO: Overridden settings: {}
2016-09-22 23:37:45 [scrapy] INFO: Enabled extensions:
['scrapy.extensions.logstats.LogStats',
 'scrapy.extensions.telnet.TelnetConsole',
 'scrapy.extensions.corestats.CoreStats']
2016-09-22 23:37:45 [scrapy] INFO: Enabled downloader middlewares:
['scrapy.downloadermiddlewares.httpauth.HttpAuthMiddleware',
 ...
 'scrapy.downloadermiddlewares.stats.DownloaderStats']
2016-09-22 23:37:45 [scrapy] INFO: Enabled spider middlewares:
['scrapy.spidermiddlewares.httperror.HttpErrorMiddleware',
 ...
 'scrapy.spidermiddlewares.depth.DepthMiddleware']
2016-09-22 23:37:45 [scrapy] INFO: Enabled item pipelines:
[]
2016-09-22 23:37:45 [scrapy] INFO: Spider opened
2016-09-22 23:37:45 [scrapy] INFO: Crawled 0 pages (at 0 pages/min), scraped 0 items (at 0 items/min)
2016-09-22 23:37:45 [scrapy] DEBUG: Telnet console listening on 127.0.0.1:6023
2016-09-22 23:37:47 [scrapy] DEBUG: Crawled (200)  (referer: None)
2016-09-22 23:37:47 [scrapy] INFO: Closing spider (finished)
2016-09-22 23:37:47 [scrapy] INFO: Dumping Scrapy stats:
{'downloader/request_bytes': 224,
 'downloader/request_count': 1,
 ...
 'scheduler/enqueued/memory': 1,
 'start_time': datetime.datetime(2016, 9, 23, 6, 37, 45, 995167)}
2016-09-22 23:37:47 [scrapy] INFO: Spider closed (finished)
- The scraper initialized and loaded additional components and extensions it needed to handle reading data from URLs.
- It used the URL we provided in the
start_urlslist and grabbed the HTML, just like your web browser would do. - It passed that HTML to the
parsemethod, which doesn’t do anything by default. Since we never wrote our ownparsemethod, the spider just finishes without doing any work.
Step 2 — Extracting Data from a Page
We’ve created a very basic program that pulls down a page, but it doesn’t do any scraping or spidering yet. Let’s give it some data to extract. If you look at the page we want to scrape, you’ll see it has the following structure:- There’s a header that’s present on every page.
- There’s some top-level search data, including the number of matches, what we’re searching for, and the breadcrumbs for the site.
- Then there are the sets themselves, displayed in what looks like a table or ordered list. Each set has a similar format.
brickset.com/sets/year-2016
 ...
...
...
...
- First, grab each LEGO set by looking for the parts of the page that have the data we want.
- Then, for each set, grab the data we want from it by pulling the data out of the HTML tags.
scrapy grabs data based on selectors that you provide. Selectors are patterns we can use to find one or more elements on a page so we can then work with the data within the element. scrapy supports either CSS selectors or XPath selectors.
We’ll use CSS selectors for now since CSS is the easier option and a perfect fit for finding all the sets on the page. If you look at the HTML for the page, you’ll see that each set is specified with the class set. Since we’re looking for a class, we’d use .set for our CSS selector. All we have to do is pass that selector into the response object, like this:
scraper.py
class BrickSetSpider(scrapy.Spider):
    name = "brickset_spider"
    start_urls = ['http://brickset.com/sets/year-2016']

    def parse(self, response):
        SET_SELECTOR = '.set'
        for brickset in response.css(SET_SELECTOR):
            pass
a tag inside an h1 tag for each set:
brickset.com/sets/year-2016
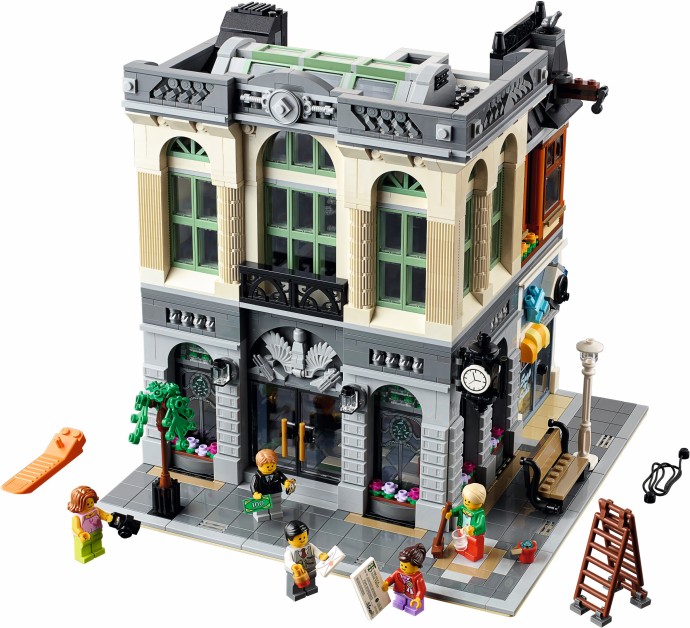
Brick Bank
brickset object we’re looping over has its own css method, so we can pass in a selector to locate child elements. Modify your code as follows to locate the name of the set and display it:
scraper.py
class BrickSetSpider(scrapy.Spider):
    name = "brickset_spider"
    start_urls = ['http://brickset.com/sets/year-2016']

    def parse(self, response):
        SET_SELECTOR = '.set'
        for brickset in response.css(SET_SELECTOR):

            NAME_SELECTOR = 'h1 a ::text'
            yield {
                'name': brickset.css(NAME_SELECTOR).extract_first(),
            }
extract_first() isn’t a typo. We’re going to add more to this section soon, so we’ve left the comma there to make adding to this section easier later.
You’ll notice two things going on in this code:
- We append
::textto our selector for the name. That’s a CSS pseudo-selector that fetches the text inside of theatag rather than the tag itself. - We call
extract_first()on the object returned bybrickset.css(NAME_SELECTOR)because we just want the first element that matches the selector. This gives us a string, rather than a list of elements.
Output
...
[scrapy] DEBUG: Scraped from <200 http://brickset.com/sets/year-2016>
{'name': 'Brick Bank'}
[scrapy] DEBUG: Scraped from <200 http://brickset.com/sets/year-2016>
{'name': 'Volkswagen Beetle'}
[scrapy] DEBUG: Scraped from <200 http://brickset.com/sets/year-2016>
{'name': 'Big Ben'}
[scrapy] DEBUG: Scraped from <200 http://brickset.com/sets/year-2016>
{'name': 'Winter Holiday Train'}
...
brickset.com/sets/year-2016
>
...
- The image for the set is stored in the
srcattribute of animgtag inside anatag at the start of the set. We can use another CSS selector to fetch this value just like we did when we grabbed the name of each set. - Getting the number of pieces is a little trickier. There’s a
dttag that contains the textPieces, and then addtag that follows it which contains the actual number of pieces. We’ll use XPath, a query language for traversing XML, to grab this, because it’s too complex to be represented using CSS selectors. - Getting the number of minifigs in a set is similar to getting the number of pieces. There’s a
dttag that contains the textMinifigs, followed by addtag right after that with the number.
scraper.py
class BrickSetSpider(scrapy.Spider):
    name = 'brick_spider'
    start_urls = ['http://brickset.com/sets/year-2016']

    def parse(self, response):
        SET_SELECTOR = '.set'
        for brickset in response.css(SET_SELECTOR):

            NAME_SELECTOR = 'h1 a ::text'
            PIECES_SELECTOR = './/dl[dt/text() = "Pieces"]/dd/a/text()'
            MINIFIGS_SELECTOR = './/dl[dt/text() = "Minifigs"]/dd[2]/a/text()'
            IMAGE_SELECTOR = 'img ::attr(src)'
            yield {
                'name': brickset.css(NAME_SELECTOR).extract_first(),
                'pieces': brickset.xpath(PIECES_SELECTOR).extract_first(),
                'minifigs': brickset.xpath(MINIFIGS_SELECTOR).extract_first(),
                'image': brickset.css(IMAGE_SELECTOR).extract_first(),
            }
Output
2016-09-22 23:52:37 [scrapy] DEBUG: Scraped from <200 http://brickset.com/sets/year-2016>
{'minifigs': '5', 'pieces': '2380', 'name': 'Brick Bank', 'image': 'http://images.brickset.com/sets/small/10251-1.jpg?201510121127'}
2016-09-22 23:52:37 [scrapy] DEBUG: Scraped from <200 http://brickset.com/sets/year-2016>
{'minifigs': None, 'pieces': '1167', 'name': 'Volkswagen Beetle', 'image': 'http://images.brickset.com/sets/small/10252-1.jpg?201606140214'}
2016-09-22 23:52:37 [scrapy] DEBUG: Scraped from <200 http://brickset.com/sets/year-2016>
{'minifigs': None, 'pieces': '4163', 'name': 'Big Ben', 'image': 'http://images.brickset.com/sets/small/10253-1.jpg?201605190256'}
2016-09-22 23:52:37 [scrapy] DEBUG: Scraped from <200 http://brickset.com/sets/year-2016>
{'minifigs': None, 'pieces': None, 'name': 'Winter Holiday Train', 'image': 'http://images.brickset.com/sets/small/10254-1.jpg?201608110306'}
2016-09-22 23:52:37 [scrapy] DEBUG: Scraped from <200 http://brickset.com/sets/year-2016>
{'minifigs': None, 'pieces': None, 'name': 'XL Creative Brick Box', 'image': '/assets/images/misc/blankbox.gif'}
2016-09-22 23:52:37 [scrapy] DEBUG: Scraped from <200 http://brickset.com/sets/year-2016>
{'minifigs': None, 'pieces': '583', 'name': 'Creative Building Set', 'image': 'http://images.brickset.com/sets/small/10702-1.jpg?201511230710'}
Step 3 — Crawling Multiple Pages
We’ve successfully extracted data from that initial page, but we’re not progressing past it to see the rest of the results. The whole point of a spider is to detect and traverse links to other pages and grab data from those pages too. You’ll notice that the top and bottom of each page has a little right carat (>) that links to the next page of results. Here’s the HTML for that:
brickset.com/sets/year-2016
li tag with the class of next, and inside that tag, there’s an a tag with a link to the next page. All we have to do is tell the scraper to follow that link if it exists.
Modify your code as follows:
scraper.py
class BrickSetSpider(scrapy.Spider):
    name = 'brick_spider'
    start_urls = ['http://brickset.com/sets/year-2016']

    def parse(self, response):
        SET_SELECTOR = '.set'
        for brickset in response.css(SET_SELECTOR):

            NAME_SELECTOR = 'h1 a ::text'
            PIECES_SELECTOR = './/dl[dt/text() = "Pieces"]/dd/a/text()'
            MINIFIGS_SELECTOR = './/dl[dt/text() = "Minifigs"]/dd[2]/a/text()'
            IMAGE_SELECTOR = 'img ::attr(src)'
            yield {
                'name': brickset.css(NAME_SELECTOR).extract_first(),
                'pieces': brickset.xpath(PIECES_SELECTOR).extract_first(),
                'minifigs': brickset.xpath(MINIFIGS_SELECTOR).extract_first(),
                'image': brickset.css(IMAGE_SELECTOR).extract_first(),
            }

        NEXT_PAGE_SELECTOR = '.next a ::attr(href)'
        next_page = response.css(NEXT_PAGE_SELECTOR).extract_first()
        if next_page:
            yield scrapy.Request(
                response.urljoin(next_page),
                callback=self.parse
            )
scrapy.Request is a value that we return saying “Hey, crawl this page”, and callback=self.parse says “once you’ve gotten the HTML from this page, pass it back to this method so we can parse it, extract the data, and find the next page.”
This means that once we go to the next page, we’ll look for a link to the next page there, and on that page we’ll look for a link to the next page, and so on, until we don’t find a link for the next page. This is the key piece of web scraping: finding and following links. In this example, it’s very linear; one page has a link to the next page until we’ve hit the last page, But you could follow links to tags, or other search results, or any other URL you’d like.
Now, if you save your code and run the spider again you’ll see that it doesn’t just stop once it iterates through the first page of sets. It keeps on going through all 779 matches on 23 pages! In the grand scheme of things it’s not a huge chunk of data, but now you know the process by which you automatically find new pages to scrape.
Here’s our completed code for this tutorial, using Python-specific highlighting:
scraper.py
import scrapy


class BrickSetSpider(scrapy.Spider):
    name = 'brick_spider'
    start_urls = ['http://brickset.com/sets/year-2016']

    def parse(self, response):
        SET_SELECTOR = '.set'
        for brickset in response.css(SET_SELECTOR):

            NAME_SELECTOR = 'h1 a ::text'
            PIECES_SELECTOR = './/dl[dt/text() = "Pieces"]/dd/a/text()'
            MINIFIGS_SELECTOR = './/dl[dt/text() = "Minifigs"]/dd[2]/a/text()'
            IMAGE_SELECTOR = 'img ::attr(src)'
            yield {
                'name': brickset.css(NAME_SELECTOR).extract_first(),
                'pieces': brickset.xpath(PIECES_SELECTOR).extract_first(),
                'minifigs': brickset.xpath(MINIFIGS_SELECTOR).extract_first(),
                'image': brickset.css(IMAGE_SELECTOR).extract_first(),
            }

        NEXT_PAGE_SELECTOR = '.next a ::attr(href)'
        next_page = response.css(NEXT_PAGE_SELECTOR).extract_first()
        if next_page:
            yield scrapy.Request(
                response.urljoin(next_page),
                callback=self.parse
            )
Conclusion
In this tutorial you built a fully-functional spider that extracts data from web pages in less than thirty lines of code. That’s a great start, but there’s a lot of fun things you can do with this spider. Here are some ways you could expand the code you’ve written. They’ll give you some practice scraping data.- Right now we’re only parsing results from 2016, as you might have guessed from the
2016part ofhttp://brickset.com/sets/year-2016— how would you crawl results from other years? - There’s a retail price included on most sets. How do you extract the data from that cell? How would you get a raw number out of it? Hint: you’ll find the data in a
dtjust like the number of pieces and minifigs. - Most of the results have tags that specify semantic data about the sets or their context. How do we crawl these, given that there are multiple tags for a single set?